Optimize your PCB assembly cost and PCB manufacturing cost with advanced design strategies. Learn how to reduce PCB assembly cost, balance price and reliability, and access high-value PCB assembly tips and market data.
Page Overview & Quick Highlights
Are you struggling to manage your PCB assembly cost or find yourself surprised by rising PCBA cost after every prototype or production run? Whether you’re a hardware developer, procurement manager, or PCB designer, the right cost-effective PCB design strategy can lead to savings of 15–40% or more while maintaining — or even improving — quality.
This comprehensive blog post explores how to reduce PCB assembly cost, optimize PCB fabrication and assembly workflows, and make informed decisions on materials, sourcing, manufacturing, and design. Drawing on global market trends, in-depth engineering principles, and actionable checklists, it’s designed for everyone seeking to extract more value from their PCB assembly services.
TL;DR (Quick Highlights)
If you only have a minute, here are essential PCB assembly tips to optimize price, yield, and manufacturability:
- Define component boundaries: Prevent solder bridging and manufacturing errors by careful library footprint creation and assembly drawings.
- Prefer SMDs and standard passives (0201–0805): Enables pick-and-place automation, shortens assembly time, and lowers procurement costs.
- Choose RoHS-compliant parts: Supports global compliance, reduces regulatory risk, and ensures component availability.
- Follow DFM/DFA/DFT: Align your design and testing philosophies to prevent delays, reduce respins, and maximize automated assembly benefits.
- Leverage market and sourcing knowledge: Stay aware of supply chain constraints (lead times, lifecycle, alternates), and engage with vetted PCB assembly services early in your process.
Why PCB Assembly Cost Optimization Matters
“A well-optimized PCB design doesn't just lower manufacturing cost—it improves reliability, accelerates time to market, and reduces risk at every stage.”—Sierra Circuits, PCB Assembly Experts
Cost overruns in PCB fabrication and assembly are not uncommon. Studies show that up to 68% of PCB respins stem from avoidable design-for-manufacturing errors1. With the growing use of high-speed, densely packed PCBs in industries from automotive to aerospace to consumer electronics, the stakes—and complexity—have never been higher.
PCB manufacturing cost is affected by hundreds of interacting variables, including material choice (FR-4 vs Rogers, copper weight, PCB thickness), inexpensive vs premium surface finishes, how you create your BOM, and which assembly process fits (SMT, THT, hybrid, or turnkey). Understanding this puzzle enables you to make smart, proactive choices, saving both time and budget.
Who Should Read This Guide?
- Hardware engineers designing for price- and reliability-sensitive applications
- Procurement and sourcing specialists responsible for cost control
- PCB designers looking to improve manufacturability
- Project managers and startup founders who need to forecast and control PCBA cost from prototype to mass production
- Academics and students prototyping for university research
Case Study: The Power of Early Optimization
A medical device startup reduced their average PCBA cost per unit by 30% simply by (1) migrating to standard package SMDs, (2) redesigning for single-sided assembly, and (3) using a DFA checklist before every prototype submission. The result? Faster time to clinical trials, no functional defects, and streamlined reordering for mass production.
Table: Common PCB Assembly Cost Ranges (by Region & Volume)
|
Region
|
PCB Prototype ($/unit)
|
Small-Batch PCBA ($/unit)
|
Mass Production (>$15k units)
|
|
China
|
10–55
|
65–180
|
1.50–7.50
|
|
USA
|
35–210
|
120–450
|
3.80–18.50
|
|
EU
|
42–130
|
88–270
|
2.60–9.40
|
|
India
|
17–62
|
54–155
|
1.10–6.30
|
In the next section, we’ll clarify the often-confused terms PCB and PCBA, giving you a strong foundation as we break down the real drivers of PCB manufacturing cost and how good design can directly reduce PCB assembly cost and drive innovation.
What is the Difference Between PCB and PCBA?
Understanding the distinction between a PCB (Printed Circuit Board) and a PCBA (Printed Circuit Board Assembly) is critical for effective design, budgeting, and communication with manufacturers and suppliers. Miscommunication at this stage can easily result in sourcing errors, cost miscalculations, or unexpected delays.
Definitions: PCB vs PCBA
Printed Circuit Board (PCB)
A PCB is a bare, non-populated board composed of one or more layers of insulating material, most commonly FR-4 glass epoxy laminate. It includes patterned copper traces, pads, and vias—defining the electrical interconnections that will link components together. The PCB does not include any electronic components and serves as the substrate or foundation for all further manufacturing and assembly steps.
Key features of a PCB:
- Copper traces and pads: Carry signals and power between points.
- Layers: Can be single-, double-, or multi-layer (e.g., 4-layer, 6-layer).
- Solder mask: The green (or sometimes black, white, or blue) protective coating.
- Silkscreen: Printed reference labels (e.g., “R1”, “C8”) for component placement and documentation.
- Vias: Holes connecting layers vertically; can be through-hole, blind, or buried.
- Surface finish: Protects the copper and allows for soldering (e.g., HASL, ENIG, OSP).
Printed Circuit Board Assembly (PCBA)
A PCBA is the finished, populated circuit board. It is the result of mounting and soldering all necessary electronic components onto the PCB substrate, through automated SMT pick-and-place, THT insertion, reflow and wave soldering, and a series of rigorous inspection and functional test processes.
Key features of a PCBA:
-
All electronic components installed
- Active (ICs, microcontrollers, FPGAs, connectors, switches)
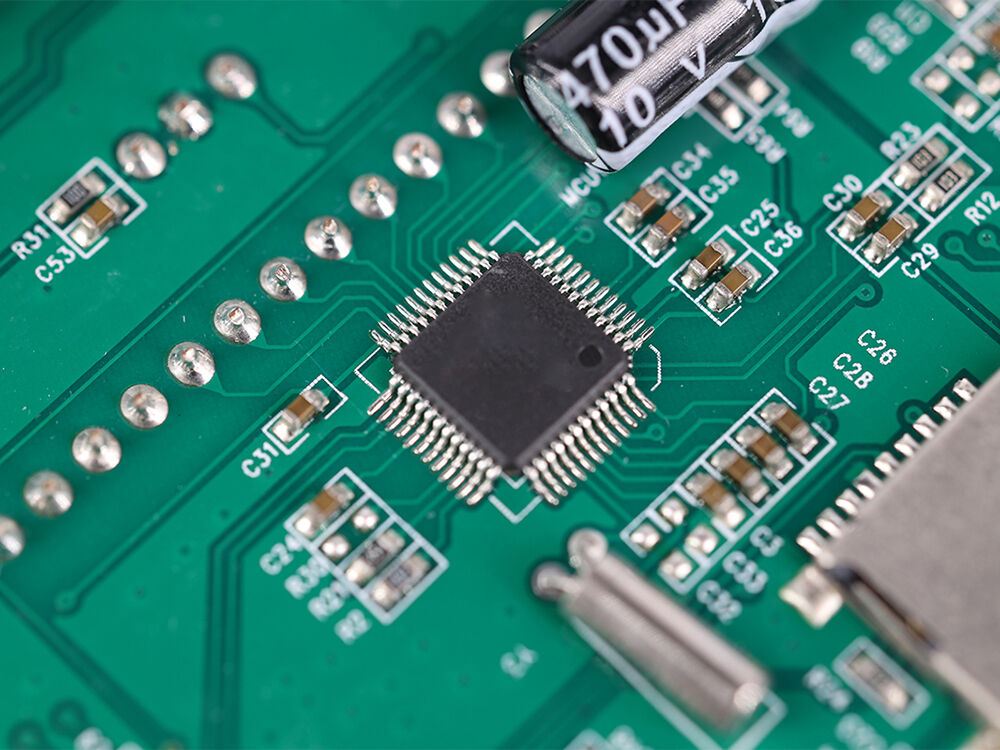
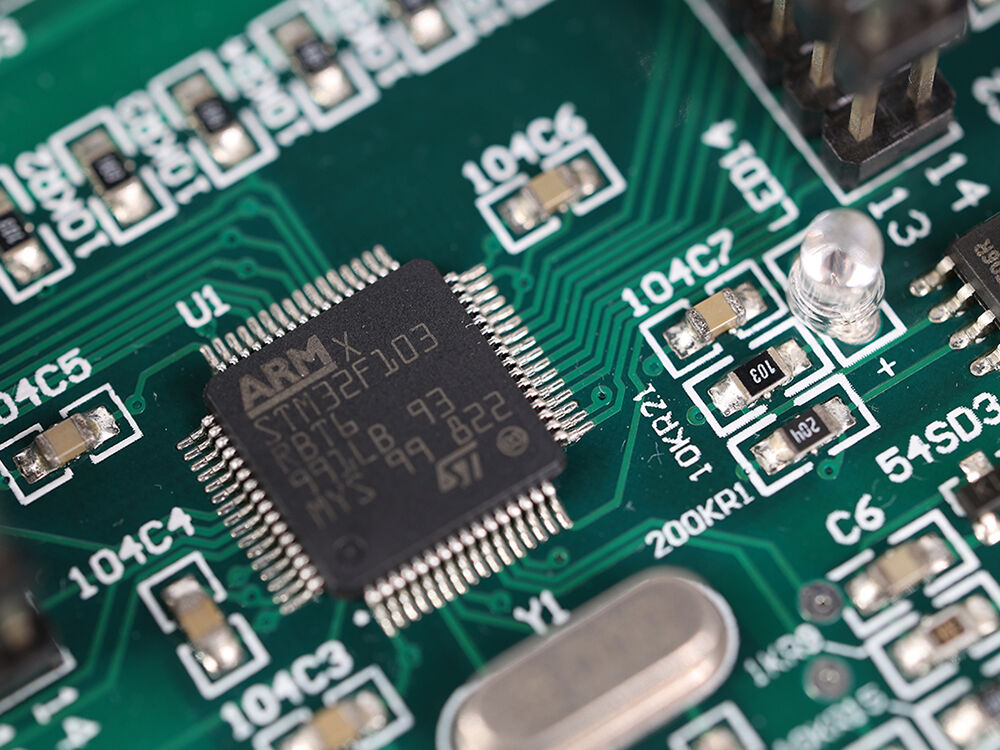
- Passive (resistors, capacitors, inductors)—often using standard SMD package sizes (0201, 0402, 0603, 0805)
- Solder joints: Secure and electrically connect each component lead or pad.
- Assembly methods: Surface Mount Technology (SMT), Through-Hole Technology (THT), or hybrid.
- Testing: Functional test, Automated Optical Inspection (AOI), X-ray, In-Circuit Test (ICT), Flying Probe.
- Ready for integration/testing in the final product.
Table: PCB vs PCBA – Head-to-Head Comparison
|
Feature
|
PCB (Bare Board)
|
PCBA (Assembled Board)
|
|
Components Mounted
|
✖ None
|
✔ Active & passive installed
|
|
Applicable Technologies
|
Copper etching, lamination
|
SMT, THT, reflow/wave soldering
|
|
Inspection/Testing
|
Electrical test, visual, AOI
|
AOI, X-ray, ICT, functional, flying probe
|
|
Typical Cost Drivers
|
Material, layers, surface finish
|
Component cost, assembly process, testing
|
|
Example
|
Blank 4-layer board
|
Fully populated Arduino, router board
|
|
Output Use
|
Cannot function standalone
|
Ready for system/module integration
|
|
Common Sourcing Terms
|
PCB prototype, bare PCB, blank PCB
|
PCB assembly, turnkey PCBA, population
|
Why This Distinction Matters for Your Budget
When requesting a quote or calculating your PCB manufacturing cost, be clear whether you need only bare boards or finished, tested PCB assembly services. Many sourcing errors and cost overruns stem from confusion between PCB and PCBA:
- Prototype PCB cost (bare boards) can be as low as $10–$50 each, while PCBA cost (including labor and component procurement) can be 2–10× higher per unit depending on complexity, BOM, and yield.
- Lead times are dramatically different: PCB fabrication may take just a few days with standard stackup and finishes, but complex PCBA involving global component sourcing and optoelectronics can stretch to several weeks.
Pro tip: When requesting a PCB quote or submitting files, always specify:
- PCB Only (upload Gerber, stackup, files, drill drawing, and design notes)
- PCBA (add Bill of Materials [BOM], pick-and-place data, assembly drawings, testing requirements)
Industry Relevance
This distinction is vital in all sectors:
- Medical device PCBs: Where assembly quality and traceability are tightly regulated.
- Aerospace and defense: High-reliability assembled boards must meet IPC Class 3.
- Automotive/high-volume consumer electronics: Cost control begins at the bare board but is dominated by assembly and component sourcing in mass production.
How Much Does a Custom PCB or PCBA Cost?
Determining your custom PCB cost or full PCBA cost is pivotal in hardware project planning. Costs vary widely based on design, volume, complexity, sourcing strategy, and supplier location—but understanding the cost drivers can help you make informed decisions and reduce surprises at every project stage.
1. Understanding PCB Manufacturing Cost
A bare PCB cost is shaped primarily by technical specifications and materials. Here are the main influencing elements:
|
Cost Driver
|
Typical Options/Specs
|
Cost Impact
|
|
Material Type
|
FR-4 (most common), Rogers/ceramic, metal core
|
High; Rogers/ceramic up to 5× FR-4
|
|
Layer Count
|
1, 2, 4, 6, 8 or more
|
Each layer adds 25–35%
|
|
Board Size & Shape
|
Custom shapes, panelization, small boards
|
Large/irregular costs more
|
|
Board Thickness
|
Standard 1.6mm, 0.8mm, 2.0mm, custom
|
Non-standard adds cost
|
|
Copper Thickness
|
1 oz (standard), 1.5/2 oz, thick copper GTX
|
Thick copper = expensive
|
|
Minimum Trace/Spacing
|
4–8 mil (0.1–0.2 mm) vs. ultra-fine (2 mil)
|
<4 mil = premium service
|
|
Drill/Via Tech
|
Tented, filled, BGA microvias, blind/buried vias
|
Micro/BGA/filled = costly
|
|
Surface Finish
|
HASL, Lead-Free HASL, ENIG, OSP, ImmAg, ENEPIG
|
ENIG/ENEPIG pricier but best for fine pitch
|
|
Mask/Silkscreen Color
|
Green (default), black, white, matte, yellow
|
Non-green adds 5–15%
|
|
Special Processes
|
Impedance control, edge plating, gold fingers, UL
|
+20–60% (high-rel or telecom)
|
Example Calculation:
- A 4-layer FR-4 board, 1.6mm thick, 1 oz copper, green mask, ENIG finish, standard tolerance:
- China prototype (5 pcs): $45–$115
- USA prototype (5 pcs): $75–$210
- Add 15–30% for impedance control or advanced features.
2. Bill of Materials (BOM) and Component Sourcing
The Bill of Materials (BOM) lists each component—with manufacturer, part number, specs, and preferred packaging (e.g., reel/tube/cut tape). Component cost drivers:
- Standard SMD passives (0201, 0402, 0603, 0805): lowest price, shortest lead time
- ICs, connectors, FPGAs, custom parts: often 70–90% of BOM cost
- Obsolete, long-lead, or non-RoHS parts: highly inflate timeline and budget
- Reel packaging: required for automation; tape/reel parts generally cost less per part than cut tape
- Sourcing location: Southeast Asia often cheapest but involves more shipping/lead time risk
Table: Typical BOM Sourcing Costs (small/medium quantity, common devices)
|
Component Type
|
China (per 1000)
|
US/EU (per 1000)
|
Comments
|
|
0402 Resistor
|
$1.20
|
$2.80
|
RoHS, high availability
|
|
0805 Ceramic Cap
|
$2.00
|
$4.10
|
|
|
SOT-23 MOSFET
|
$7.80
|
$12.50
|
|
|
Medium MCU/QFP
|
$220
|
$370
|
May tie to MOQ/lead time
|
|
HDMI Connector
|
$48.00
|
$89.00
|
Custom/large connectors costlier
|
|
Board Edge Connector
|
$120.00
|
$155.00
|
|
3. PCB Assembly (PCBA) Cost Structure
Your PCBA cost is composed of:
- PCB fabrication (see above)
- Component procurement (total BOM price + shipping/consolidation)
- Assembly labor: Includes SMT (Surface Mount Technology) placement, reflow soldering, THT insertion, wave soldering
- Testing & Inspection: AOI, X-ray, In-circuit testing (ICT), flying probe, functional test
- Logistics/packaging: Handling, ESD-safe packaging, documentation
Real Cost Example (Mid-Complexity Consumer Device, 250 pcs)
|
Cost Component
|
Cost per Board
|
|
Bare PCB (4L, ENIG)
|
$8.50
|
|
Components (50 parts)
|
$19.50
|
|
SMT/THT Assembly
|
$9.75
|
|
AOI + Functional Test
|
$2.25
|
|
Total PCBA Cost
|
$40.00
|
4. Prototype vs Production Cost Ranges
|
Volume
|
PCB Only (2L, FR-4, HASL)
|
PCBA (50–200 components)
|
Key Notes
|
|
5 pcs (Proto)
|
$18–$120
|
$90–$390
|
High start-up due to setup
|
|
100 pcs
|
$5–$36
|
$22–$115
|
Unit price drops sharply
|
|
1,000+ pcs
|
$1.50–$10
|
$7.50–$35
|
Mass automation, JIT sourcing
|
5. Other Price Considerations
- Expedited lead time (“QuickTurn”): +20–50% on base price, sometimes mandatory for R&D/field trial projects.
- NI/UL/CE/IPC class: Reliability or safety requirements (IPC Class 3 for aerospace, medical) can add 10–25%.
- Advanced assembly/test labor: BGA, large BGAs (>1,000 balls), high-speed/AI modules, high-reliability soldering can double unit costs.
Case Study: How BOM Optimization Slashed PCBA Cost
A consumer IoT startup discovered that one obsolete op-amp in their design added a 9-week lead time and over $2.50 per board due to scarcity. By redesigning to use a more available, RoHS-compliant SMD part, they cut procurement costs by $19,000 in their first Y1 production run and improved shipment reliability by 2 weeks.
Market Projections: Global & North America, 2023–2029
Understanding market trends is essential if you want to optimize your product strategy, negotiate better rates for PCB assembly services, or anticipate supply chain disruptions that could affect your PCB assembly cost. Today’s PCB and PCBA markets are dynamic, shaped by relentless innovation in sectors like automotive, telecom, and consumer electronics, along with ongoing global supply chain shifts post-pandemic. Let’s dive into the latest numbers.
Global PCB Assembly and Fabrication Market Size
According to data from Sierra Circuits Market Research and references from the Printed Circuit Board Association of America (PCBAA):
- Global PCBA Market Size (2023): ~$45.1 billion USD
- Projected Size (2029): ~$62.5 billion USD
- Compound Annual Growth Rate (CAGR): ~6.6% (2024–2029)
Drivers of Market Growth
- Increasing adoption of SMT, HDI, microvia, and advanced packaging in automotive, medical device, AI/robotics, and 5G/IoT hardware.
- Shift toward miniaturization: Standard package sizes (0201, 0402, 0603, 0805) are increasingly favored to support both form factor and automation goals.
- Electrification and connectivity: Demand for high-reliability boards in EVs, smart appliances, and wearables.
- Regional supply chain resilience: More companies seeking near-shoring/dual-sourcing strategies to reduce lead times and avoid shipping bottlenecks.
Table: Global PCB Assembly Market—Growth by Region
|
Region
|
Market Size (2023, $B)
|
Projected 2029 ($B)
|
CAGR (2024–29)
|
Key Segments
|
|
Asia-Pacific (China, Taiwan, S.Korea)
|
27.2
|
37.4
|
5.6%
|
Mobile/consumer, LEDs, TWS
|
|
North America
|
7.9
|
11.7
|
6.9%
|
Automotive, aerospace, med
|
|
Europe
|
6.8
|
9.9
|
6.5%
|
Industrial, telecom, auto
|
|
Rest of World
|
3.2
|
3.5
|
3.7%
|
Test/measurement, specialty
|
North American PCB Assembly Market
Key Statistics:
- 2023 revenue: ~$7.9 billion USD
- 2029 estimate: ~$11.7 billion USD
- Growth drivers: Onshoring for security (defense/aerospace); EV manufacturing; medical & industrial automation
Industry Trends:
- Automotive PCB assembly in the US is projected to grow 8%+ CAGR fueled by electrification and in-vehicle networks.
- Defense & aerospace demand has led to more IPC Class 3 and fully traceable, high-reliability assemblies.
- Medical PCB assembly: Increased during the pandemic, remains steady with ongoing demand for diagnostics, wearables, and implantable devices.
Market Factors Impacting Cost Structure
- Labor and regulatory costs: Higher in North America and Europe, but often offset in high-reliability, short-run, and regulated markets by risk reduction and faster communication.
- Component sourcing resilience: US/EU OEMs often pay premiums for guaranteed onshore inventory and short lead time delivery.
- Emergence of rapid prototyping and small-batch pick-and-place automation: Even lower-volume startups benefit from advanced automation that was once reserved for Fortune 100 companies.
- Shift toward DFM/DFA/DFT best practices as cost management becomes integral from the project’s design phase, not just procurement.
Table: Typical PCB Assembly Cost by Region (2023–2029 Projections)
|
Region
|
Prototype PCBA ($/unit)
|
Mass Production PCBA ($/unit)
|
Typical Lead Time (Days)
|
|
China
|
$60–$200
|
$1.80–$8.60
|
7–17
|
|
USA
|
$110–$360
|
$3.40–$17.80
|
5–21
|
|
EU
|
$90–$260
|
$2.60–$11.50
|
6–20
|
How Market Trends Should Inform Your PCB Assembly Decisions
- For startups and SMBs: Balance global pricing with fast turnaround. Use cost-effective PCB design, prioritize SMD package sizes, and do DFM checks early to avoid border delays and last-minute substitutions.
- For OEMs in regulated industries: Pay attention to growing onshore capacity, and don’t underestimate the value of local compliance, direct engineering support, and emergency procurement flexibility—even at nominally higher unit prices.
- For procurement specialists: Watch for spikes in lead times or BOM item pricing driven by macro events (e.g., chip shortages), and always seek alternative parts in the early design phase.
Case Study: EV Startup Navigates Market Shifts
A California EV startup originally sourced their PCBA from China for prototyping at $58/unit. For production, recurring shipping delays and customs caused multi-week slips. By engaging a North American PCB assembly service leveraging advanced pick-and-place automation (and using DFA/DFM design reviews), their cost rose slightly to $74/unit—but time-to-customer dropped from 6 weeks to 2 weeks, warranty returns fell by 28%, and investor confidence soared.
What Factors Affect PCB Assembly Price?
Successfully optimizing your PCB assembly cost requires a clear understanding of the factors that directly influence both the prototype and mass-production phases. Whether you are developing medical device PCBs with high-reliability needs, automotive PCBs where volume drives every penny, or electronics that require a balance of cost and innovation, these six key drivers shape your final PCBA cost.
1. Component Procurement Costs
Component procurement is often the single most significant factor in your PCBA cost, especially during times of global supply volatility.
-
Component type and packaging:
- Standard SMD packages (0201, 0402, 0603, 0805) are cheaper and more available than odd sizes or specialty chips.
- Through-hole and legacy parts (THT) increase cost due to more manual labor and difficult sourcing.
-
Brand and quality level:
- Authentic, tier-one brands cost more but reduce failure risk, critical for aerospace, defense, and automotive applications.
-
Lifecycle and lead time:
- Obsolete or allocation-status parts can inflate costs by 5-10× and may force urgent design respins.
- RoHS-compliant and in-stock alternatives help ensure smoother procurement and lower risk.
-
Reel and tape packaging:
- Tape and reel are preferred for automation and can reduce cost by cutting setup time and machine downtime.
2. Assembly Process and Technology
How your board is assembled is another major driver. The following choices significantly impact PCB assembly cost:
-
Surface Mount Technology (SMT):
- Automated, high-speed, cost-effective for small and large runs.
- Placements per hour often exceed 50,000. Lower labor, lower error risk.
-
Through-Hole Technology (THT):
- Required for connectors, high-current, or mechanical rigidity.
- Slower, more manual, more expensive.
-
Double-sided assembly:
- If both sides have SMD or THT parts, cost goes up ~30–50% due to extra setup, handling, and complexity.
-
BGA, CSP, or fine-pitch ICs:
- Require advanced machines, X-ray inspection, and skilled labor, adding up to 40% to the assembly price.
3. Board Design Complexity and Fabrication
How your board is designed (not just in function, but in physical layout) has deep cost implications. Key variables:
-
Layer count:
- 2-layer PCBs are straightforward. Moving to 4/6/8 layers increases PCB manufacturing cost, but can sometimes reduce overall PCBA cost by enabling better routing or single-sided SMD assembly.
-
Board size and shape:
- Small, regular rectangles allow for higher panel density and lower per-unit price.
- Custom cutouts, heavy copper, or thick boards add significant cost.
-
Trace width/spacing and via technology:
- Fine pitch (below 4 mil/0.1 mm) and microvias require expensive fabrication processes and higher quality control.
-
Surface finish:
- For fine-pitch and lead-free assembly, ENIG or ENEPIG is ideal but costs 50%+ more than HASL.
-
Impedance control, edge plating, and gold fingers:
- Often necessary for high-frequency, connectorized, or high-reliability applications.
|
Design Variable
|
$ Impact (baseline)
|
Example
|
|
Layer count
|
+25–35% per layer
|
6L vs 4L = +50–60%
|
|
Gold finish
|
+10–60%
|
ENIG vs HASL
|
|
Microvias/HDI
|
+30–90%
|
Used in BGA/HDI
|
|
Custom shape
|
+5–30%
|
Non-rectangular
|
4. Testing and Quality Control
Testing is critical for yield, warranty exposure, and compliance—but it also adds cost:
- Automated Optical Inspection (AOI): Rapid, cost-effective for SMDs.
- X-ray inspection: Essential for BGAs, costly but invaluable.
-
In-circuit testing (ICT) and flying probe:
- ICT requires test fixtures (expensive for low volume, amortized for mass production).
- Flying probe is flexible for NPI, but slower for large runs.
-
Functional testing and burn-in:
- Often included free for low-quantity prototypes, but is charged in production runs.
- Highly recommended for all boards above IPC Class 2.
5. Volume, Lot Size, and Lead Time
Your order size and delivery requirements can dramatically affect the final price:
-
Prototyping:
- Set-up, programming, and stencil costs are amortized over very few units, raising per-unit price.
-
Mass production:
- Economies of scale drop the per-unit cost sharply.
-
Expedited or premium lead times:
- 24–48 hour turns can add up to 90% for prototypes, although urgent fieldwork may justify the cost.
6. Regulatory, Documentation, and Compliance
-
IPC Class 2 vs Class 3:
- Class 2 is standard for most electronics; Class 3 is for life-critical or high-reliability (adds to inspection, process, documentation, traceability costs).
-
RoHS/UL/CE compliance, serialization, and reports:
- Required for medical, automotive, and aerospace. Adds cost but essential for certifications and safety.
Summary Table: The Six Core Drivers of PCB Assembly Cost
|
Cost Driver
|
How It Raises / Lowers PCBA Cost
|
|
Component procurement
|
Obsolete/rare parts, no alternates, custom footprints vs. standard SMD packages
|
|
Assembly process
|
THT/manual labor and double-sided vs. single SMD, pick-and-place automation
|
|
Board design
|
More layers, fine pitch, custom shapes, advanced finishes
|
|
Testing/inspection
|
BGA/narrow pitch, extensive functional testing, regulatory demands
|
|
Volume/timeline
|
Prototype = high setup/unit cost, mass production = lower, expedited = higher
|
|
Compliance
|
IPC Class, traceability, documentation, serialization, UL mark
|
Knowing these drivers empowers you to make targeted changes, leveraging DFM, DFA, and DFT not only to improve assembly yield and reliability, but to reduce PCB assembly cost without compromising quality.
9 Design Tips to Reduce Circuit Board Assembly Cost
Effective PCB design is the single best way to reduce your PCB assembly cost. The foundation of cost-effective PCB design is laid during the earliest design choices—component selection, layout, footprint, and even your approach to testing. Use these nine expert-backed PCB assembly tips to streamline your workflow, control your manufacturing budget, and avoid most common respin and rework costs.
1. Select Components with Standard Package Sizes to Simplify the Supply Chain
Why: Using standard Surface Mount Device (SMD) package sizes (such as 0201, 0402, 0603, 0805) makes your Bill of Materials (BOM) robust and supply chain-friendly. It directly reduces PCBA cost by enabling high-speed pick-and-place automation, cutting programming/setup time, and ensuring component availability even during shortages.
Checklist: Part Selection Strategies for Lower PCB Assembly Cost
- Adopt standard sizes: Stick to 0201, 0402, 0603, 0805 for passives.
- Follow IPC-7351 land pattern guidelines: Adopt proven pad sizing and keep clear documentation.
- Check availability and lead times: Use real-time BOM tools or partner with PCB component sourcing services.
- Perform lifecycle checks: Avoid NRND (Not Recommended for New Design) and EOL (End-Of-Life) parts.
- Maintain alternate part numbers: Always list backup, drop-in replacements in your BOM (e.g., for capacitors and resistors).
- Use flexible component values/tolerances: Unless precision is essential, use ±10% or ±20% where possible for easier sourcing.
- Minimize part count: The fewer unique placements, the faster and cheaper your assembly.
- Avoid overspecification: Don’t use a tight-tolerance/temperature-grade part unless the application truly requires it.
- DNI marking: Use Do-Not-Install indicators for optional or testing-stage parts.
- Prefer RoHS-compliant, reel-packaged components: Supports compliance and automation.
- Group by package: Design to minimize machine head changes.
Table: Cost Impacts of Package Choice
|
Package Size
|
Relative Cost
|
Machine Speed
|
Supply Resilience
|
Comment
|
|
0201, 0402, 0603
|
Cheapest
|
Fastest
|
Best
|
Standard for IoT, mobile, automotive
|
|
1206, SOT-223
|
Slightly more
|
Medium
|
Good
|
Use if power needs dictate
|
|
THT
|
Most expensive
|
Slowest
|
Poorest
|
Reserve for connectors, large caps, etc.
|
Case Study: A robotics startup cut its PCBA cost by 22% and lead time by 16 days after moving all passives to 0402 and 0603, eliminating 5 obsolete THT parts that previously required manual placement.
2. Provide Sufficient Component Spacing to Prevent Solder Bridging and Simplify Assembly
Why: Crowded board layouts increase the risk of solder bridging, placement errors, rework, and failed X-ray inspection. Proper component spacing is essential for both automated assembly (pick-and-place) and manual rework.
Key Placement Tips
- Minimum placement courtyards: Maintain at least 0.25 mm spacing as a baseline for most SMD packages.
- BGA exceptions: 1.0 mm mark for placement, and 0.15 mm for sub-0603 passives.
-
Part-to-edge recommendations:
- Large components: 125 mil (3.18 mm)
- Small components: 25 mil (0.635 mm)
- Hold-downs/clamps: Allow ample real estate for mechanical stabilization during reflow.
- Annular ring spacing: 8 mil (0.2 mm) part-to-hole; 7 mil (0.18 mm) component-to-annular ring.
- Avoid pads under components unless required for thermal performance (see DFM notes).
- Panelization & depanelization: Mind board edge clearance for panel cutting (router/laser).
- Manual vs automated assembly: Automated assembly needs extra space for vision alignment and head clearance.
Table: Recommended Spacing Guidelines
|
Feature
|
Min. Spacing
|
|
Standard SMDs
|
0.25 mm
|
|
<0603 (Very Fine Pitch)
|
0.15 mm
|
|
BGA Ball-to-BGA
|
1.00 mm
|
|
Part-to-Edge (small/large)
|
0.635/3.18 mm
|
|
Part-to-Hole
|
0.20 mm
|
|
To Annular Ring
|
0.18 mm
|
Quote:
“Most board defects occur because of insufficient spacing. More than half of all rework could be eliminated by following standard component placement rules.” — Senior SMT Process Engineer, EMS Provider
3. Adhere to DFA Standards to Minimize Turnaround Time
Why: Following Design for Assembly (DFA) principles avoids unnecessary hand placements, reduces the risk of misplaced or missing components, and enables the fastest possible turnaround.
DFA Techniques to Cut Assembly Costs
- Avoid overpopulation: Only use necessary parts; skip redundant features or “just-in-case” options.
- Regular board shapes: Rectangles panelize best, maximize yield per panel, and reduce depanelization cost.
- Account for environment: Use through-hole only when vibration/mechanical reliability dictate.
- Ensure thermal relief: Design pads for efficient solder flow while preventing excess copper heat sinking.
- Address trace/drill tolerances: Follow DRC recommendations for minimum annular rings and routing.
- No edge-mount components: Unless essential or mechanically stabilized.
- SMD orientation consistency: Minimize machine rotation by keeping parts oriented the same way.
- Accessibility: Keep test points and adjustment components clear and accessible.
- Verify footprints early: Prevent "footprint mismatch," a leading cause of respins and urgent fixes.
Case Study: A large contract manufacturer received an NPI with mismatched SOT-23 footprints, requiring a production halt. The team introduced a DFA checklist, caught 6 similar issues in later projects, and now avoids a full respin in each quarterly release.
4. Follow DFM Guidelines for Ensuring Manufacturability
Why: Design for Manufacturability (DFM) integrates your board’s physical design with real-world assembly realities, lowering risk of rework and wasted yield.
DFM Guidelines
- Group components by function (e.g., power, RF, logic) for logical and visual troubleshooting.
- Place all SMTs on one side wherever possible to minimize machine setup and stenciling passes.
- Avoid stacking SMTs on both sides, which raises assembly cost by 30–60%.
- Reduce unnecessary board layers (e.g., avoid moving from 4- to 8-layer unless functionally necessary).
- Clearly mark reference designators for all placements.
- Reuse proven designs—copy layouts that passed yield and test in prior products.
- Collaborate with manufacturer early for stackup, LPI, and test-point review.
5. Employ SMDs Wherever Possible for Rapid Placement and Lower Cost
Why: Standard SMDs enable high-speed, reliable machine pick-and-place, streamline reflow soldering, and drive automation savings. Through-hole is only cost-effective for unique mechanical/thermal scenarios.
SMT Design Strategies
- Choose cost-effective, popular SMDs (see “standard sizes” above).
- Design with surface-mount footprints.
- Avoid mechanical fasteners and large standoffs unless required for mechanical strength.
- Group similar components (by value/package) for rapid feeder setup and less operator intervention.
- Minimize SMD variants: Use common values and ratings unless function demands otherwise.
6. Prioritize Design for Automation: Pick-and-Place, Reflow, and Test
Why: Automation is essential for consistent assembly quality, throughput, and minimizing PCB assembly cost as your product scales.
Automation Best Practices
- Snap-together or self-locating components (clips, pin headers with polarized keys).
- Consistent angular orientation: Line up all SMDs in the same “north” direction.
- Limit fastener and mechanical part varieties to reduce operator error.
- Ensure component robustness: Avoid fragile leads and designs that cannot survive machine placement.
- Easy-to-orient packages: Favor components designed for quick vision system alignment.
Photo Reference: A Juki pick-and-place machine placing 0402 and 0603 resistors at 50,000+ parts/hour with < 1 error/1,000,000 parts.
7. Implement DFT Rules: Design for Testing
Why: A board that is hard or expensive to test risks hidden defects, expensive field failures, and costly returns. Design for Testing (DFT) bridges design, assembly, and quality control, ensuring robust PCBA cost management through efficient, scalable, and repeatable testing. DFT attention is especially important for high-density SMT, BGA, and any board requiring guaranteed long-term reliability.
13 Rules for DFT Implementation
- Test Point for Every Net: Where possible, provide one labeled test point per circuit net for complete electrical connectivity validation.
- Clear Labels: Use silkscreen (0.050 in font minimum, 0.005 in clearance) for visible, readable test point IDs.
- Polarity and Pin Marking: Clearly mark polarities, pin-1 locations, and test critical orientation on silkscreen.
- Accessible Placement: Ensure probe access with at least 2mm open landing zone. Avoid placing test points under large ICs or connectors.
- Dedicated Probe Pads: Use gold-finished probe pads (1.5–2.0 mm diameter, ENIG finish preferred) for flying probe or bed-of-nails ICT.
- Boundary-Scan (JTAG): Add TAP (Test Access Port) connectors for microcontrollers, FPGAs, and high-CSP logic devices.
- BIST Features: Design in features for Built-In Self-Test, saving external fixture costs and reducing production line test time.
- Test Access Ports: Where possible, add headers for temporary debug and power-up.
- Select IPC Class 2 vs Class 3: Choose the appropriate reliability class unless customer standards dictate otherwise.
- Font Guidelines: Avoid ultra-small or reverse (negative) silkscreen. Use high-contrast white-on-green or black-on-white for best visibility.
- Prepare for ICT and Flying Probe: Plan panelization, test area, and pad accessibility according to fixture or probe vendor specs.
- Test Points for Voltage and Ground: Always have a convenient labeled access for 3.3V, 5V, and ground plane for power and current checks.
- Document Test Plan: Provide the test/QA team with documentation for expected signal levels and required test coverage.
Example: A telecom board designed with test points under the BGA had a 7% test failure rate until the next revision, which provided side-accessible labeled test pads. After DFT improvement, yield hit 99.7% and test throughput doubled.
8. Employ Lean Design Principles to Eliminate Waste and Lower PCBA Cost
Why: Lean thinking—borrowed from industrial manufacturing—directly lowers PCB manufacturing cost by systematically removing all non-value-added steps, reducing inventory, overprocessing, and defects.
8 Lean Design Principles for PCBA
- Simplify, Simplify, Simplify: The simplest board that fulfills requirements is the most robust and cost-effective.
- Logical Component Arrangement: Place parts in assembly order sequence to streamline placement and inspection.
- Optimize Trace Spacing and Board Size: Minimize unused area (don’t pay for blank board) while avoiding crowding.
- Minimize Non-Washable Components: Avoid parts that require manual masking for wash processes after reflow.
- Skip Unnecessary Washing: If the assembly is RoHS and does not require cleaning, skip the washing step.
- Kaizen (Continuous Improvement): Bake in time for post-PROTOTYPE review and ongoing design revision, learning from feedback.
- Standardize Designs and Processes: Where possible, re-use reference designs, proven footprints, and standard process flows.
- Design to Actual Demand: Match board and order size to real projected market or internal requirements to avoid excess inventory/obsolescence.
- Sustainability Practices: Where possible, spec RoHS, consider recyclability, and minimize hazardous processes.
Example: A university group designing for low-volume prototypes elected to switch from eight voltage rails (unnecessary complexity) to two, shrinking BOM by over 20 parts and dropping PCBA cost per board by $9.
9. Conduct a Cost-Benefit Analysis at the Start of Every Major Design or Order
Why: A disciplined cost-benefit analysis lets teams weigh technical advantages, ROI, and risk reduction strategies before locking in expensive design or procurement decisions.
Steps for PCB Assembly Cost-Benefit Analysis
- Define Objectives: What is the primary goal—reduce unit cost, achieve quality/reliability, or meet regulatory/market?
- Break Down Cost Components:
-
- PCB fabrication (layers, finish)
- Components (total BOM, substitutes)
- Assembly labor (SMT, THT, double-side, Inspection)
- Test and quality control (ICT, AOI, X-ray)
- Overhead and yield loss
- Identify Optimization Strategies: Review DFM, DFA, and DFT options.
- Estimate Projected Savings: Use historical data or quote simulation tools.
- Evaluate Feasibility and Risks: What trade-offs (e.g., sacrificing flexibility for cost, risking extended lead times for advanced parts)?
- Prioritize and Select Strategies: Choose optimizations that provide the greatest impact for the lowest risk.
- Assess Schedule and Quality Impacts: Assess how changes affect time-to-market and product reliability.
- Document Findings: Recording analysis helps future design cycles and procurement negotiations.
- Monitor Effectiveness: After implementation, measure the realized cost savings and adjust future SOPs.
- Consider Outsourcing: Evaluate PCB component management services—trusted vendors can leverage economies of scale for inventory, yield, and negotiation power.
Case Example: An industrial controls OEM ran simulations showing a $32 upfront cost increase for advanced AOI/X-ray but a downstream savings of $2,700 per 1,000 units in returns and support. The change was approved, resulting in both lower total PCBA cost and higher customer satisfaction.
These nine strategies are the foundation for controlling your PCB assembly cost—whether prototyping for research, launching a consumer product, or building industrial and automotive PCB assemblies at scale.
Downloadable Resources & Tools
Equipping yourself and your team with the right resources is crucial for sustaining a cost-effective PCB design and assembly practice. Here are essential handbooks, tools, and links to directly impact your PCB assembly cost reduction strategy:
1. Design for Assembly (DFA) Handbook
A deep, step-by-step guide covering:
- Placement courtyards and spacing
- Footprint and component orientation
- Panelization, depanelization, and fiducial placement
- Avoiding assembly bottlenecks in SMT and THT
2. Design for Testing (DFT) Handbook
A practical manual for implementing:
- Rules for optimal test point placement and labeling
- Flying probe and in-circuit testing techniques
- Ensuring probe accessibility and minimizing test failures
- Testing for high-density boards (BGA, QFN)
3. PCB DFM Tool
Upload your Gerber files to receive an instant manufacturability and cost analysis:
- Get DFM feedback on stackup, layer count, drill tolerances, finish
- Highlight risks (impedance mismatches, spacing, tight annular rings)
- Identify errors before fab/assembly, reducing respin risk
4. BOM Checker Tool
Automated BOM review for pricing, availability, and alternates:
- Eliminate obsolete or expensive parts
- Receive instant sourcing feedback and suggest comparable, lower-cost options
- Data on RoHS compliance, lead times, lifecycle status
Related Blogs, Community, and Events
Stay current, engage with peers, or resolve your toughest PCB assembly cost questions through these valuable links:
Key Takeaways
Here’s a quick summary of best practices to reduce PCB assembly cost and boost manufacturability:
- Choose standard, RoHS-compliant SMD packages — supports automation and supply resilience.
- Provide sufficient, documented component-to-component and part-to-edge spacing.
- Avoid overpopulation and keep your BOM as lean as possible.
- Maintain consistent component orientations to simplify pick-and-place programming.
- Minimize rotation angles and avoid unnecessary through-hole or nonstandard parts.
- Use snap-together or keyed connectors where possible.
- Include labeled test points and silkscreen markings to streamline DFT and debugging.
- Collaborate with your PCB assembly service provider during the initial design phase for DFM/DFA checks.
- Leverage downloadable tools and checklists—don’t “design in the dark.”
Conclusion: Optimize Early, Collaborate Often, Reduce PCB Assembly Cost for the Long Term
Optimizing your PCB assembly cost isn’t just about cutting corners—it’s about designing smarter from the start. From selecting readily available, standard SMD components and adhering to DFM/DFA/DFT best practices, to automating testing and leveraging global market insights, every action you take in the design phase can cascade down to material savings, fewer production headaches, and a more robust product in the hands of your customers.
Throughout this guide, you’ve learned how global PCB and PCBA market trends impact procurement and PCB manufacturing cost, how small layout changes can shave weeks off your lead time, and how to align design choices with real-world assembly realities. Remember, the path to cost-effective PCB design isn’t about sacrificing quality—it’s about making choices that maximize reliability, yield, and manufacturability. Whether you’re developing for high-volume consumer devices, aerospace-grade reliability, or research prototypes, these principles scale to fit your needs.
Action Plan Recap
- Apply DFM and DFA guidelines from the first schematic draft.
- Optimize your BOM with a focus on standard footprints, lifecycle management, and alternative sources.
- Incorporate DFT and lean design to minimize waste, speed up testing, and eliminate avoidable field issues.
- Leverage market data to inform sourcing decisions and timeline planning.
- Partner with reputable PCB assembly services—those who offer engineering support, real-time DFM/data feedback, and transparent tracking from quote to shipment.
Why Start Today?
The earlier you implement these best practices, the more dramatic—and sustained—your cost savings will be across the full lifecycle of your product, from prototype to mass production and beyond. In an industry pressured by rapid innovation, supply chain uncertainty, and increasing quality demands, your ability to beat the clock and control costs is your most powerful competitive advantage.
Subscribe and Join the Conversation!
- ✓ Get practical PCB assembly tips, in-depth case studies, and exclusive event invites.
- ✓ Ask questions and contribute to solutions on the kingfieldpcba.
- ✓ Leave your feedback or share your cost-reduction wins in the comments below!
Additional Reading & Resources
Explore more strategies for sustainable manufacturing, advanced stackup design, and engineering for reliability in our curated. Or, bookmark our site for future reference as your projects—and ambitions—grow.
Meta Description (SEO-optimized, 155–160 characters):
Discover how to reduce PCB assembly cost with expert design tips, step-by-step DFM/DFA/DFT strategies, BOM optimization, and real-world market data.
 Hot News